
When I first heard about DTF printing, I was skeptical. As someone who had spent years wrestling with vinyl cutters and screen printing setups, the idea of a process that could handle full-color designs on demand seemed too good to be true. But after testing it in my own shop for the past year, I can tell you this: DTF is not just a fad. It has fundamentally changed how I approach custom apparel, and if you're in the print-on-demand business, it might do the same for you.
What Exactly Is DTF Printing?
DTF stands for Direct to Film. Unlike DTG (Direct to Garment) which prints directly onto the fabric, DTF involves printing your design onto a special film, applying a thermoplastic powder to the wet ink, and then curing it. The result is a transfer that you can heat-press onto almost any fabric: cotton, polyester, blends, even nylon. That versatility is a huge advantage over older methods.
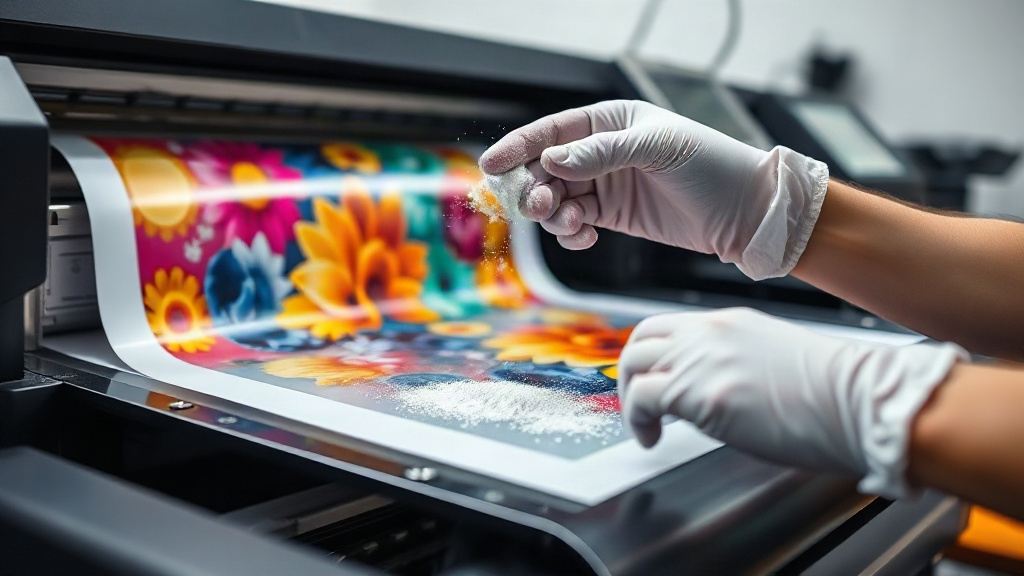
The process itself is straightforward, but the details matter. You start with a digital design, print it onto DTF film using a specialized printer with pigment inks, sprinkle hot-melt powder over the wet print, shake off the excess, and then cure the powder with a heat source. Once cured, the transfer is ready to be applied with a heat press. The film peels away either hot or cold, depending on the film type, leaving a soft, vibrant print that stretches with the fabric.
Why DTF Is Gaining Traction in Print on Demand
If you've been in the POD space for a while, you know the pain points: DTG is great for cotton but struggles on synthetics; vinyl is durable but limited in color complexity; screen printing is cost-effective at scale but a nightmare for one-offs. DTF sidesteps many of these issues. It works on virtually any fabric, requires no weeding, and handles gradients, photographs, and fine details with ease.
Another big draw is the low barrier to entry. You don't need a warehouse full of equipment. A decent DTF printer, a heat press, and a curing oven (or even a heat gun in a pinch) can get you started. For small business owners and side hustlers, that accessibility is a game-changer.
Cost Considerations
Let's talk money. A DTF setup isn't free, but it's more affordable than you might think. Entry-level printers start around $2,000, and consumables (film, powder, ink) add up to roughly $1-2 per A4 sheet. Compare that to DTG, where a single shirt can cost $3-5 in ink alone, and the savings become clear. Plus, because you can print multiple designs on one film sheet and store them, you reduce waste and can fulfill orders faster.
Step-by-Step: How to Execute a DTF Transfer
Getting a perfect DTF transfer isn't rocket science, but skipping steps will cost you. Here's the workflow I've refined after countless trial runs.
1. Design and Print
Start with a high-resolution image (300 DPI minimum). Mirror the design horizontally before printing, because you'll be flipping it onto the fabric. Load your DTF film into the printer with the matte side facing the print head. Use the correct ink profile for your printer; pigment inks designed for DTF are essential. Print at a quality setting that lays down enough ink without saturating the film.
2. Apply Powder
While the ink is still wet, sprinkle hot-melt powder evenly over the print. You can use a shaker bottle for better control. Then tilt the film and tap off the excess. You want a thin, uniform layer. Too much powder and the transfer will feel rough; too little and it won't adhere properly.
3. Cure the Powder
This is the make-or-break step. You need to melt the powder until it turns glossy, but not so much that it burns. A curing oven at 320°F (160°C) for 2-3 minutes works well. If you're using a heat press, set it to 320°F and press for 30-60 seconds with low pressure. The powder should look like a shiny plastic layer. Let it cool completely before storing or using.
4. Heat Press Application
Preheat your heat press to 320°F (160°C). Place the transfer on the garment with the printed side up. Press for 15-20 seconds with medium pressure. Then peel the film. For most films, you can peel hot, but some require cooling first. Check your film's instructions. After peeling, give it a second press for 5-10 seconds with a protective sheet (like parchment paper) to ensure full adhesion.
Common Pitfalls and How to Avoid Them
Even with the best intentions, things can go wrong. Here are the issues I see most often, and how to fix them.
- Ink bleeding or smudging: This usually means you're using too much ink or the wrong film. Reduce ink density and ensure you're using film designed for DTF.
- Powder not sticking: If the ink is too dry before powdering, the powder won't adhere. Work quickly, or increase humidity in your workspace.
- Cracking after washing: This often results from under-curing the powder or not enough pressure during application. Make sure the powder is fully melted and use consistent pressure.
- Film peeling off after wash: This can happen if the garment wasn't pre-pressed to remove moisture, or if the transfer wasn't pressed long enough. Always pre-press for 5-10 seconds before applying.
Choosing the Right Supplies for Your DTF Setup
Not all DTF supplies are created equal. The film quality, powder mesh size, and ink formulation all affect your final output. For film, look for double-sided matte options that prevent curling. Powder typically comes in 80-100 micron range; finer powder gives softer hand feel but can be messier. And for ink, stick with reputable brands that are designed specifically for DTF printers. Cheap ink might save a few bucks but will clog your print head and cost you more in the long run.
Is DTF Right for Your Business?
If you're doing small batches, offering a wide range of colors, or working with diverse fabrics, DTF is likely a strong fit. It's also fantastic for adding names and numbers to jerseys, or for creating sample pieces without committing to screens. However, if you're producing thousands of identical shirts, screen printing may still be more cost-effective. The key is to match the method to your production profile.
Frequently Asked Questions
How long does a DTF transfer last?
With proper application and care, a DTF transfer can last 50+ washes. Wash inside out in cold water and avoid bleach or fabric softener to extend its life.
Can I use DTF on dark and light fabrics?
Yes, DTF works on both. The white ink layer in the print provides opacity on dark garments, while on light fabrics you can skip the white layer if you want a softer feel.
Do I need a special printer for DTF?
You need a printer that uses pigment inks and is compatible with DTF film. Many people convert Epson or Ricoh printers, but dedicated DTF printers are also available and often easier to maintain.
What's the difference between DTF and DTG?
DTG prints directly onto the garment, while DTF prints onto a film that is then transferred. DTF works on more fabrics and doesn't require pretreatment, but DTG can be faster for single items on cotton.
How do I store DTF transfers?
Keep them in a cool, dry place away from direct sunlight. Place them between sheets of parchment paper to prevent sticking. Properly stored, they can last for months.
DTF printing has opened doors for my business, and I believe it can for yours too. The learning curve is manageable, and the results speak for themselves. If you're ready to dive in, start with a small kit, practice the steps, and don't get discouraged by early mistakes. Before long, you'll be producing vibrant, durable prints that your customers will love.